How Guests Book
Here's what your guests see, step by step, when they book on their phone. Knowing the flow makes it easier to answer questions and to set up items that are quick to buy.
1. Choose what to book
The Book page lists everything you sell: activities, parties, upcoming events and memberships, each with a photo and starting price.

2. Pick a date, time and guests
On the item page, guests tap a date on the calendar (closed and sold-out days are marked), choose a time, then use the + and − buttons for each guest type. Add-ons like grip socks are right below. The estimated total updates as they go.
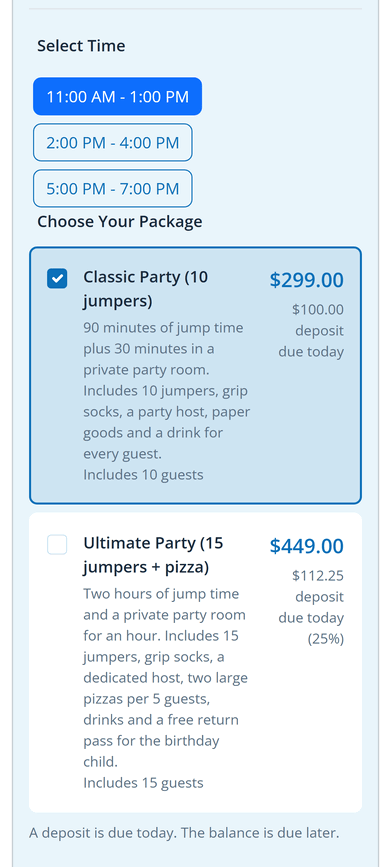
For parties, guests choose a package first. Each package shows what's included and the deposit due today.
3. Review the cart
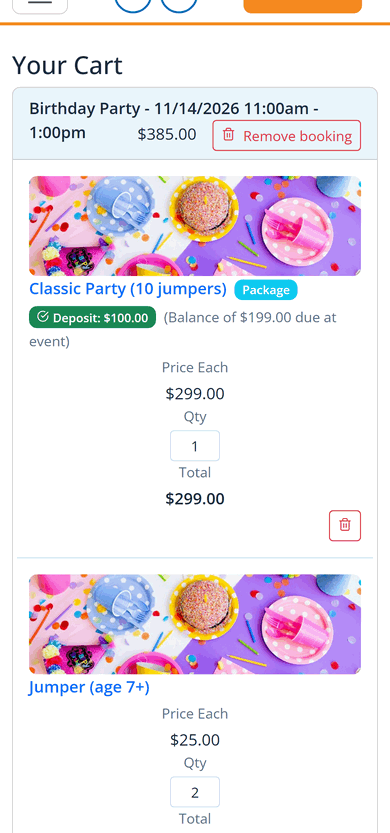
The cart shows each item, the booking fee and tax, so the total is clear before checkout. With a deposit, it shows what's due today and what's due at the event.
4. Check out
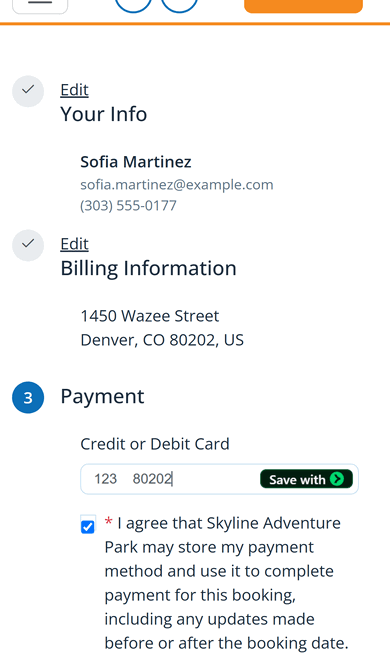
Checkout has three short steps: contact details, billing address and card. No account is needed. If a deposit is taken, the guest checks a box to keep their card on file for the balance.
5. Confirmation and waivers
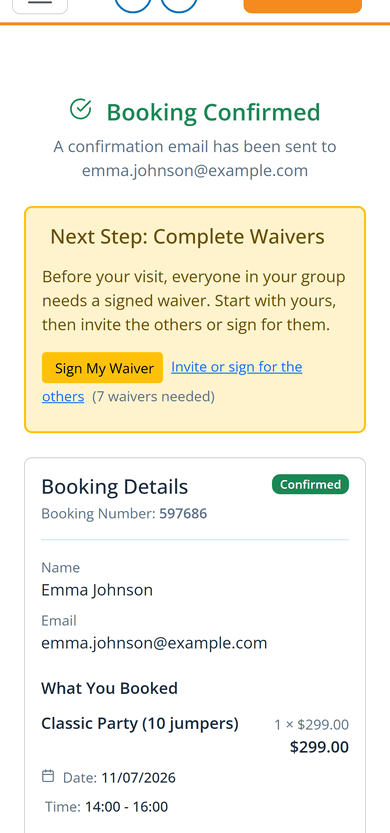
The confirmation page shows the booking, the receipt, the check-in code and the next step: Sign My Waiver. A confirmation email goes out too. See Waivers After Booking.
Events and memberships
Events work the same way: guests choose tickets on the event page and check out. Memberships have their own join page where guests pick a price, add the people covered and pay. See What Members Can Do in Their Account.