Self Check-In and the WaiverFile Venue App
Let guests check themselves in. They scan their code on a tablet at the entrance (or tap a button on their own phone) and walk in, while staff watch arrivals come in on their screen. Lines get shorter and staff can focus on guests who need help.
Ways guests can check in
- On a tablet at your entrance running the WaiverFile Venue app in self check-in mode. Guests scan the code from their confirmation email or phone.
- On their own phone, from their booking page, during the check-in window you set.
- At the front desk, where staff scan or click as usual (see Checking Guests In at the Front Desk).
The WaiverFile Venue app
WaiverFile Venue is our free app for iPads, iPhones and Android phones and tablets. Get it on the App Store or Google Play. One app, five jobs:
- Standalone waivers: guests sign waivers on the tablet, and it keeps working when the internet is down.
- Signing station: a tablet staff send groups to when someone still needs to sign.
- Self check-in: guests scan their code and check themselves in.
- Staff scanner: staff scan codes on a phone as guests arrive.
- Front desk: staff sell, take payments and check guests in (see The Front Desk in the WaiverFile Venue App).
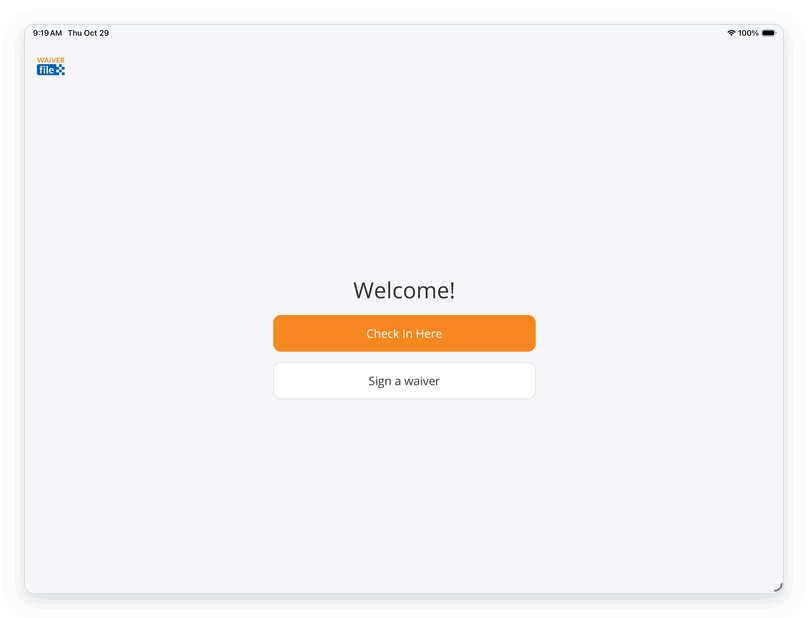
Guests tap Check In Here and scan their code, or use Find my booking with their last name and booking number (or phone number). The app shows who's in the group, and they tap Check in all.
Set up a device
- Install WaiverFile Venue on the tablet or phone and open it.
- In the admin, go to Check-in & devices › Devices (classic menu: Settings › Devices) and click Set up a device. Scan the code with the device, or type in the short code. No password is needed.
- Choose what the device is for: standalone waivers, signing station, self check-in, staff scanner or front desk. You can change it later: click the device's name on the Devices page.
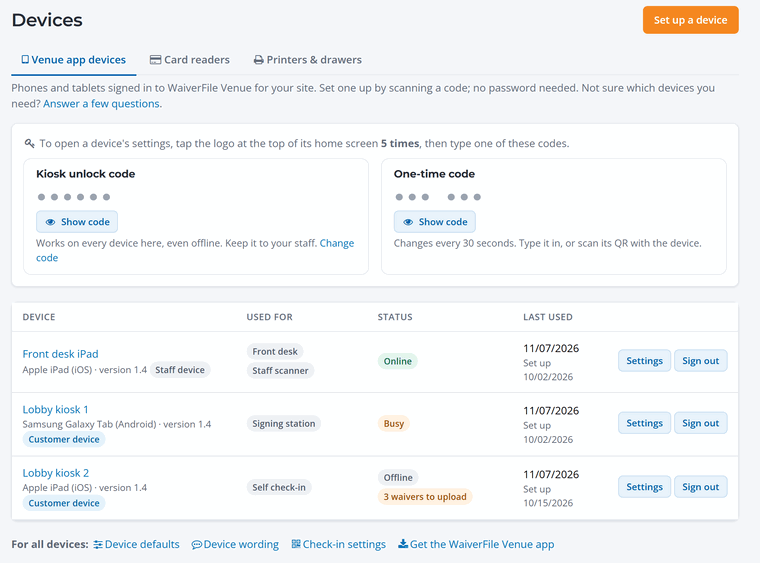
Guest screens have no settings button, so guests can't change anything. Staff open the settings by tapping your logo or business name at the top five times quickly, then entering the kiosk unlock code or a one-time code. Both are at the top of the Devices page: click Show code to see them.
Self check-in settings
Under Check-in & devices › Check-in (classic menu: Settings › Check-in Settings), on the Self check-in tab, choose what happens after a group checks itself in, and when they're allowed to.
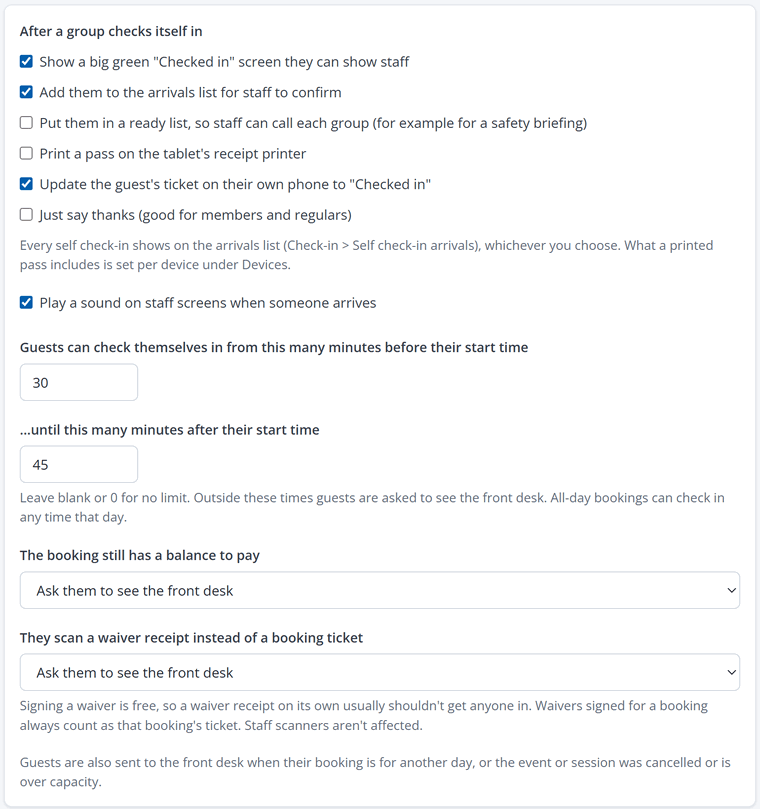
- After a group checks itself in: show a big green "Checked in" screen, add them to the arrivals list for staff to confirm, put them in a ready list (for example for a safety briefing), print a pass, update the ticket on their phone, or just say thanks.
- Check-in window: how many minutes before and after their start time guests can check themselves in. Outside the window they're asked to see the front desk. All-day bookings can check in any time that day.
- Balance due: ask them to see the front desk, or let them in and show the balance on the arrivals list.
- Play a sound on staff screens when someone arrives.
Guests are always sent to the front desk if their booking is for another day, the session was cancelled, or someone still needs to sign and your settings require it. They see a friendly "Please see staff" message, and the case shows up in the dashboard's Sent to staff list.
Watching arrivals
Every self check-in appears under Check-in › Self check-in arrivals and on the dashboard, so staff always know who's in the building.
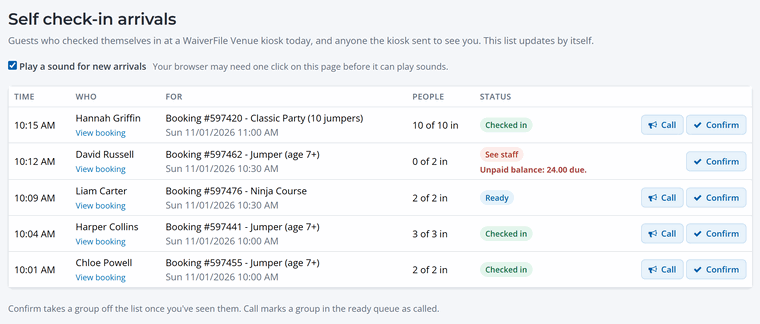
Each row shows when the group arrived, their booking, how many of them are in and their status. See staff rows include the reason, such as an unpaid balance. Click Confirm to take a group off the list once you've seen them, or Call to mark a group in the ready list as called.