Check-In Codes and Settings
Turn on check-in codes and every booking, ticket and membership gets a QR code. Guests show it when they arrive, staff scan it, and the whole group is checked in, with any missing waivers flagged right away.
Turn on guest codes
Go to Check-in & devices › Check-in (classic menu: Settings › Check-in Settings) and, on the Guest codes tab, click Turn on guest codes. Codes are off until you turn them on.

Once codes are on, guests get their code:
- on the order confirmation page and in their confirmation email,
- on their booking page, with a button to email it to themselves,
- and members get a member card with their own code in their account.
The code page shows only the booking, date and number of people. No names or personal details are shown, so it's safe to show on a phone or print.
When a code is scanned
Decide what happens when something isn't quite right. For each case you can Allow, Warn staff, then allow, or Don't allow (a manager can override):
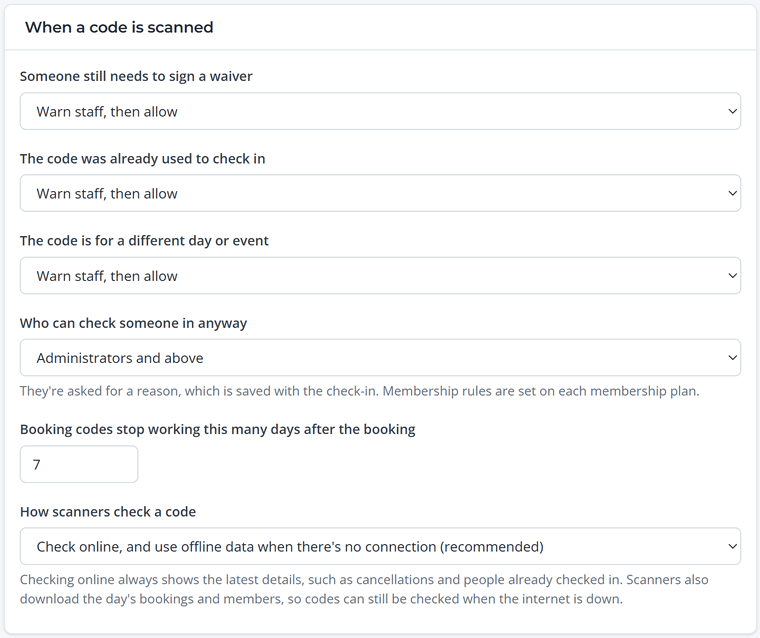
- Someone still needs to sign a waiver.
- The code was already used to check in.
- The code is for a different day or event.
You can also choose who can check someone in anyway, how many days after the booking a code keeps working, and how scanners check codes when the internet is slow or down.
The codes guests get
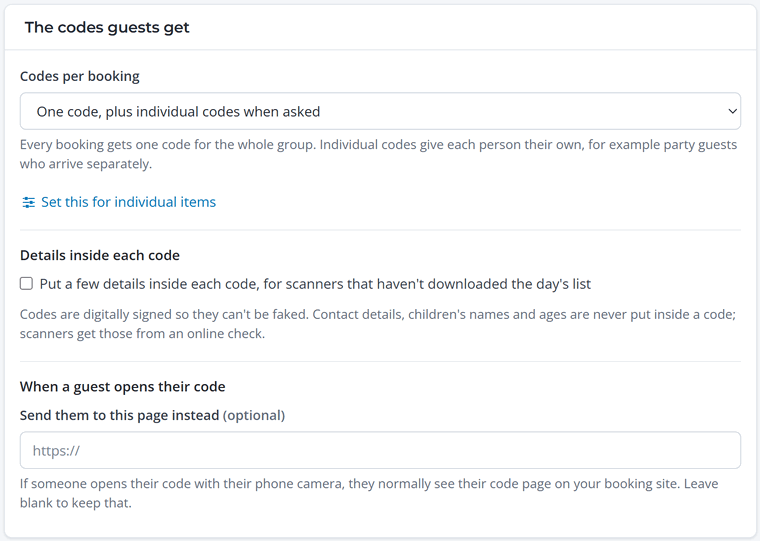
- One code for the whole booking is simplest. One scan checks in the group.
- One code, plus individual codes when asked lets you give each person their own code from the booking, for example party guests arriving separately.
- Everyone gets their own code for activities where people come and go on their own.
Waiver codes
Separately, you can turn on codes on waiver receipts, so people who only signed a waiver (without booking) can be scanned in too. Choose how many times each code can be used and when it expires.
Next: Checking Guests In at the Front Desk and Self check-in.