How to Redirect Somewhere Else After Signing a Waiver
The default signing process in WaiverFile works in a loop. After signing a waiver, it takes you back to the beginning so someone else can sign a waiver next. This works in many cases, but not all. You may want to redirect people somewhere else after they complete signing.
There are a few ways you can setup a redirect:
Option 1: Use a Custom Confirmation Page
The first way to customize the flow is to setup a custom confirmation page. To do this:
-
Log into your dashboard
-
Go to Waiver Forms
-
Under the form you want to work with, click Customize Labels.
-
Go to the Thank You - Default tab
-
Check the box Customize the Thank-You Screen.
-
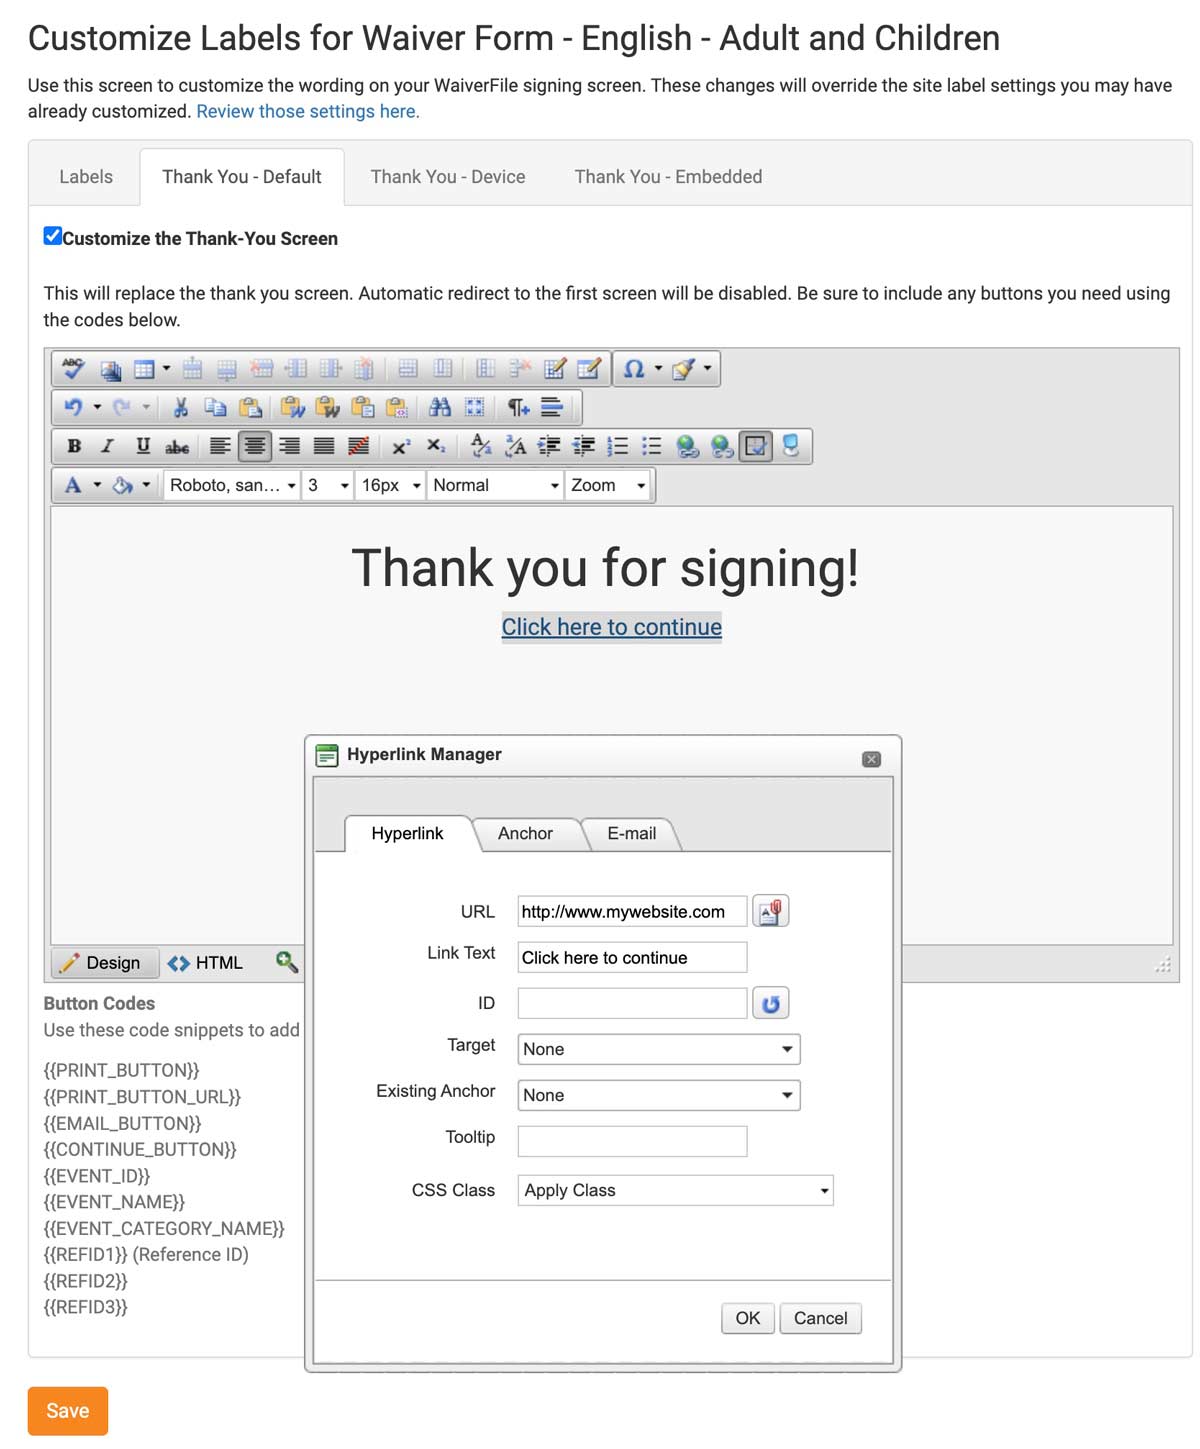
This will display an editor. The content you add here will be displayed on the confirmation page after signing is complete for this form.
To make a good-looking confirmation page, add a large title that says “Thank You”, or something similar. Then add some additional text. Below the editor are some codes you can use. These provide options to create buttons such as Continue, Print, and Email.
To make a link that goes elsewhere, use the hyperlink tool: 
Option 2: Use a Redirect Parameter
The other way to direct users elsewhere is to begin with a custom link. You can add a return web address that will direct users to the link rather than circling back to the beginning. To do this, you will add a “Src” or "Redir" parameter. The easiest way to do this will be to use the Custom URL Maker tool.
To use it, begin by finding the URL of the place that you want the link to start on. This can be your signature area's main page, or somewhere specific such as a form or an event. To get the URL, just navigate to the page that you want and copy the address from the address bar in your web browser.
Paste this into the url maker tool and then paste in the target URL that you want users to be taken to after signing. Click the button to create your custom link and share that link.
If you have questions about how to customize the items in this article or need assistance building a special link, contact us today and we can assist you!