How to set up electronic waiver forms
Getting Started with WaiverFile
The video below will walk you through the initial setup of WaiverFile and setting up your first electronic waiver form. In just a few minutes you'll be online taking waivers and making your business more efficient!
How to Setup Your Online Waiver Form
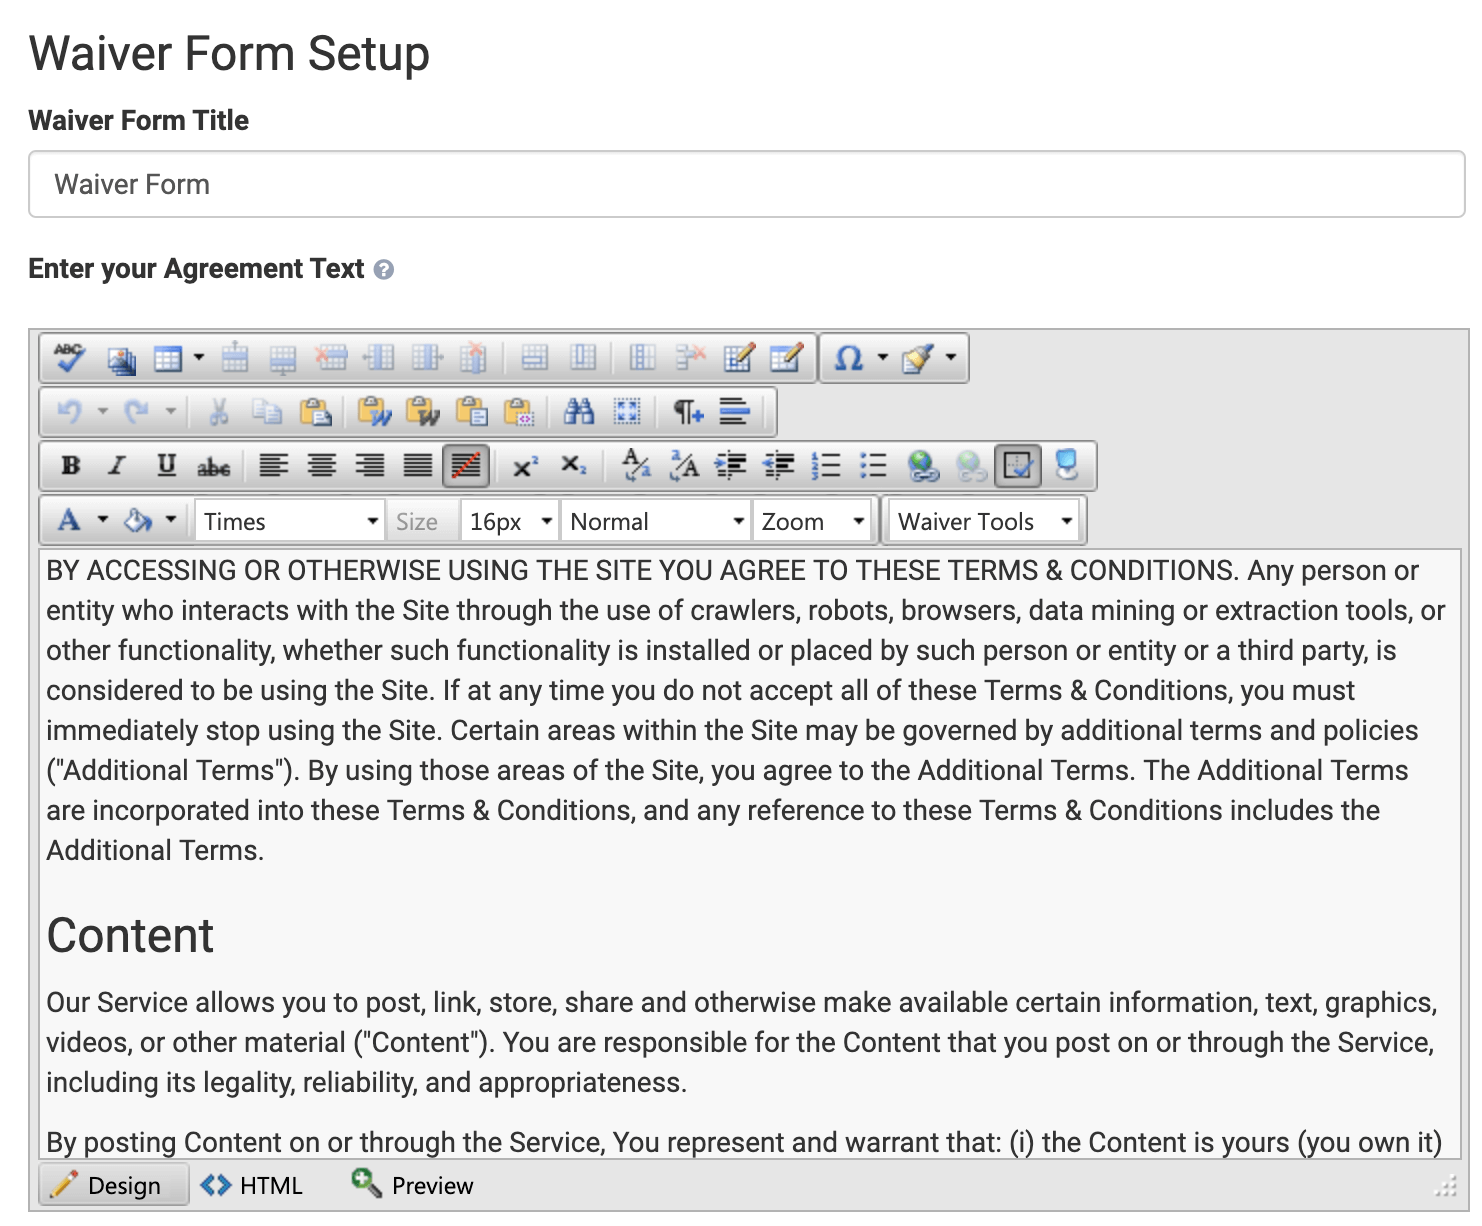
1. Setup your agreement text.
Give your waiver form a name (just Waiver Form works, or you can be more specific). This will appear as a title on the signing page. Then add your agreement text. You can copy and paste this in. If you are pasting in from Microsoft Word, you may want to use the Paste from Word button:  . This will prompt you to paste your content in a window and it will help transition the formatting from a word processing document to a web-based view.
You can also use the editor to adjust your fonts, colors and other formatting.
Be sure to check out the Image icon  which will let you add your logo or other images to the form. If you paste images in from Word or a PDF, they may need to be added separately.
If you have questions in your form shown as underlines, we'll need to convert those questions to a web-based entry that is easy to follow. For now, you can just remove those questions from the editor and continue to the next step.
If you wish to add locations to initial within the document, add the following code:
{{INITIAL}}
When the form appears, customers will be prompted to initial in that location.
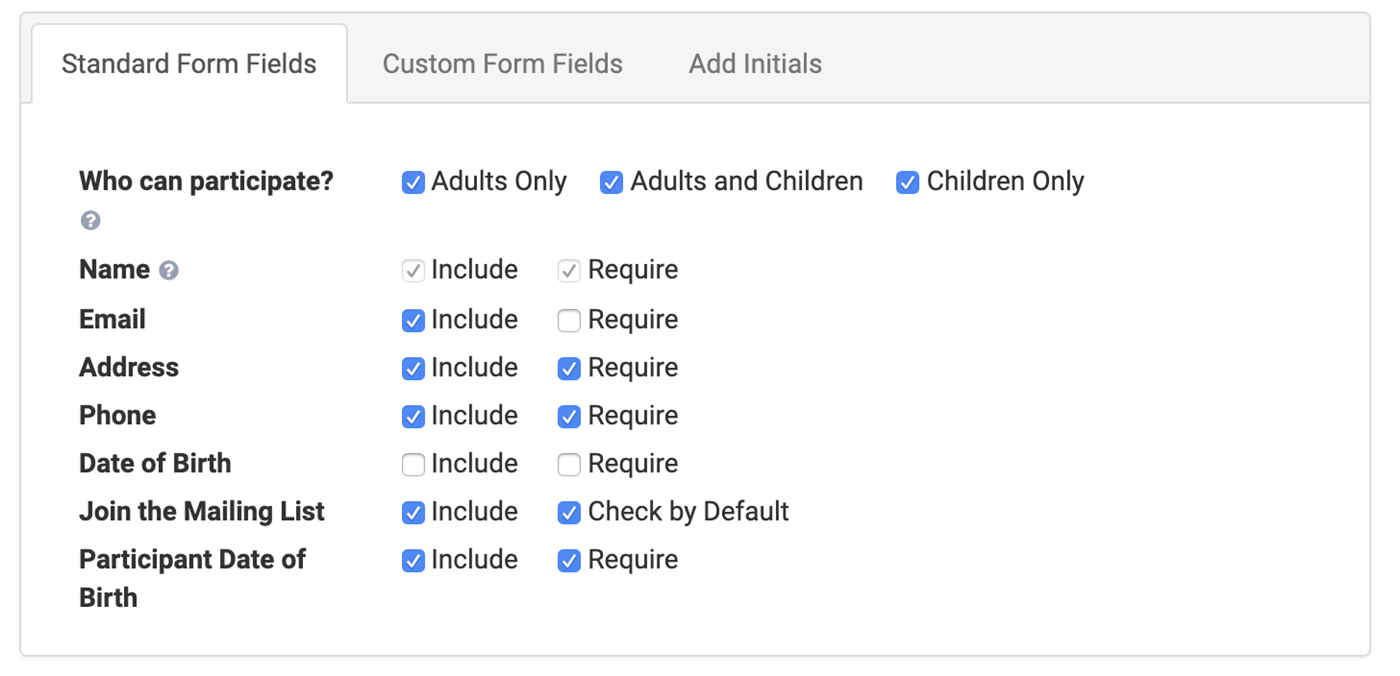
2. Select Basic Questions
Below the editor, you can check boxes to enable or disable standard form fields, like email, phone, date of birth, etc. Check the boxes to mark them to be included in your form.
You'll see a question, "Who can participate?". This question gives you a choice of adults, children, or both. Depending on your situation, you can check any combination of these. If you select more than one, the signee will be given a choice. If signing for children, additional boxes will be added to the form to collect participant names and other data. The difference between Adult and Children and Children Only is how participants are tracked. In the dashboard, if you choose Children only, the signee is listed on the form but not tracked as a participant for check-in purposes. The form is otherwise the same. If you leave them all checked, the signee will have a choice to indicate if they are participating or not.
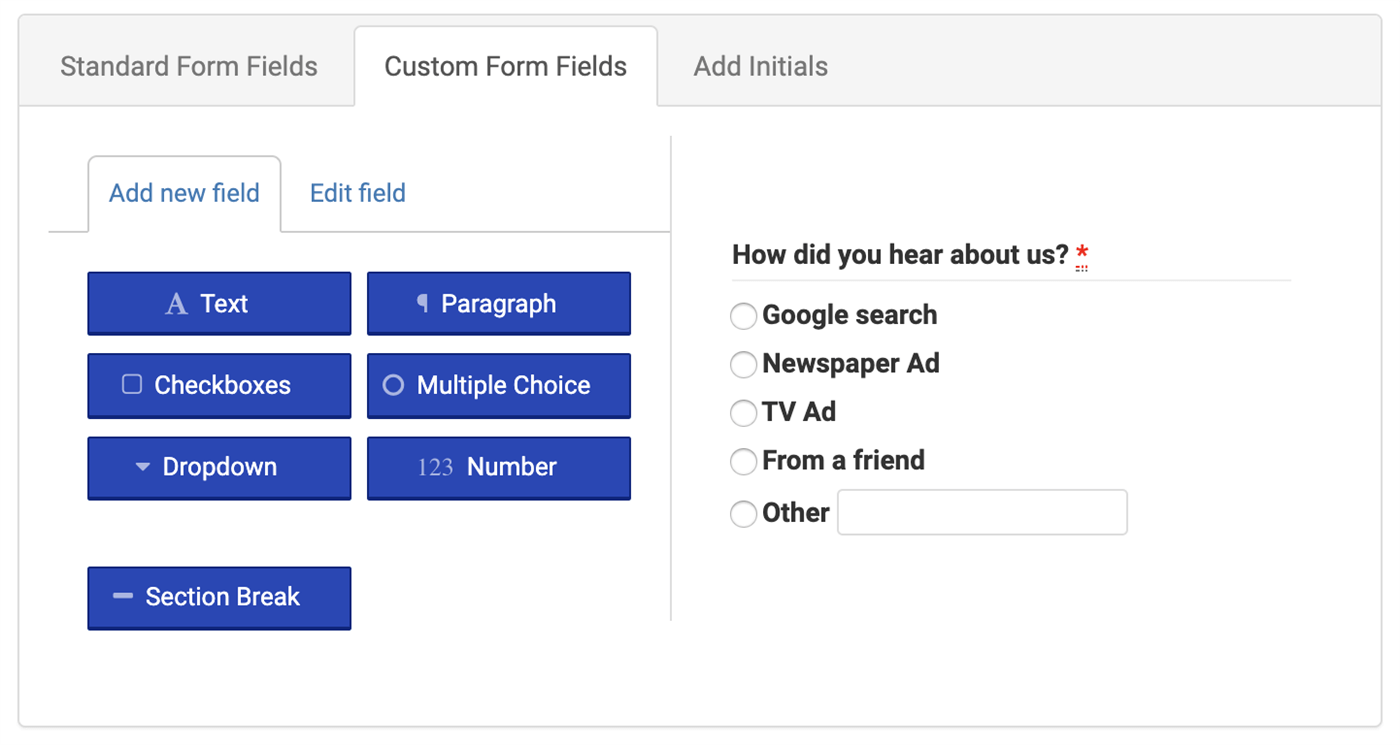
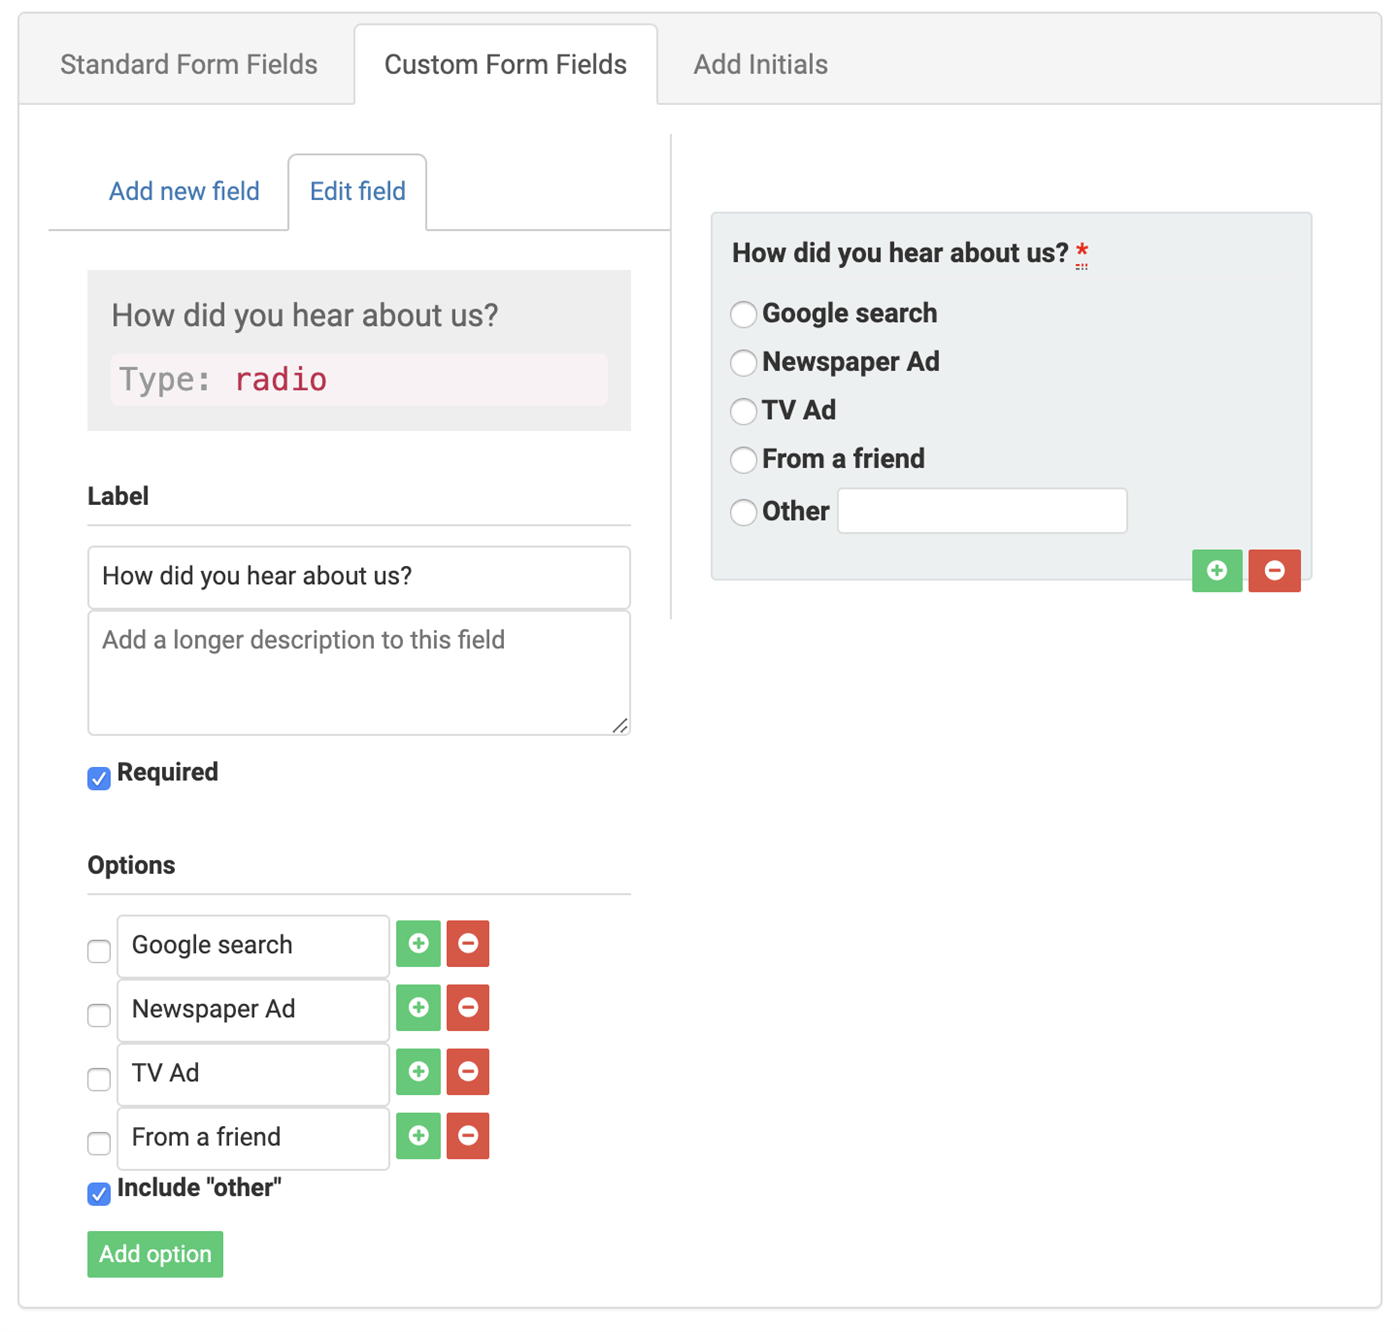
3. Custom Questions: Using the Form Builder
To add additional questions to your form, select the Custom Form Fields tab. On the left you will see a list of new field types that you can select from. Click on one to add a field of that type. Click on a field on the right side and you'll be able to edit the settings for that field. Different field types have different settings. For example, dropdown lists include buttons to add and remove items within the list while a basic textbox has fewer options.
Once you have completed your configuration, click on Save at the bottom of the screen.
4. Additional Settings
On the Waiver Forms page, you'll see each of your forms listed with a series of buttons below. Here is a breakdown of each of these buttons and what they do:

Edit Waiver Form
Make waiver form agreement text and question changes (as shown above).
Advanced Settings
Additional settings can be configured here, including maximum participants, minimum age, and more.
Participant Questions
This screen includes a separate form builder, just like the main one, but these questions are related to participants (children). Since adults can sign for more than one child at once, these questions will repeat for each child added to the form.
Customize Labels
Use this screen to customize any of the labels on the waiver form screen. You can override labels on an account level by going to Customize >> Labels on the left-hand menu. When customizing labels for an individual form, check the box on the left side of each row to override the account-level setting.
Get QR Code
This will give you a QR code that points directly to this form. Customers can scan the QR code with their phone to go directly to that form on their smartphone.
Duplicate
Make a copy of this waiver form.
Disable/Activate
You can activate and disable forms as needed.
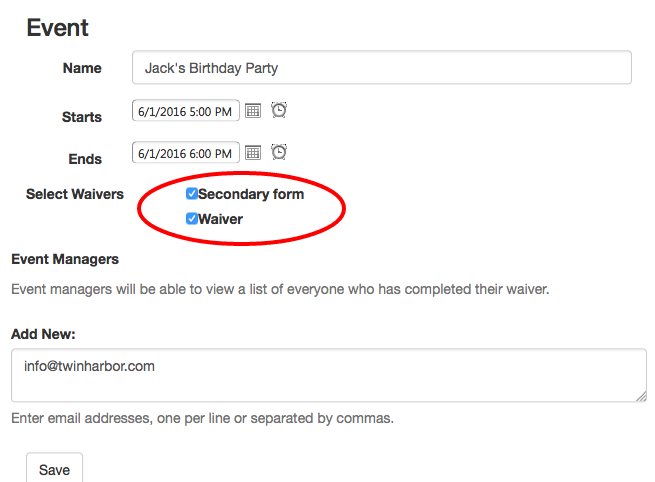
Setting Up Multiple Digital Waiver Forms in WaiverFile
WaiverFile includes support for multiple waiver forms. There are many scenarios that may require that you have either different versions of a waiver form, or even completely different agreements. You may also want to collect different information from customers depending on what event they are attending, or what activity they are participating in. To set this up, you can create additional Waiver Forms in your WaiverFile admin panel. Here’s how:
First, log into your WaiverFile admin panel. To get there, go to yoursite.waiverfile.com/admin (replacing “yoursite” with your custom website URL. Once there, log in using your email address and password. If you’ve forgotten your password, just click on the “forgot password” link to generate a new password.
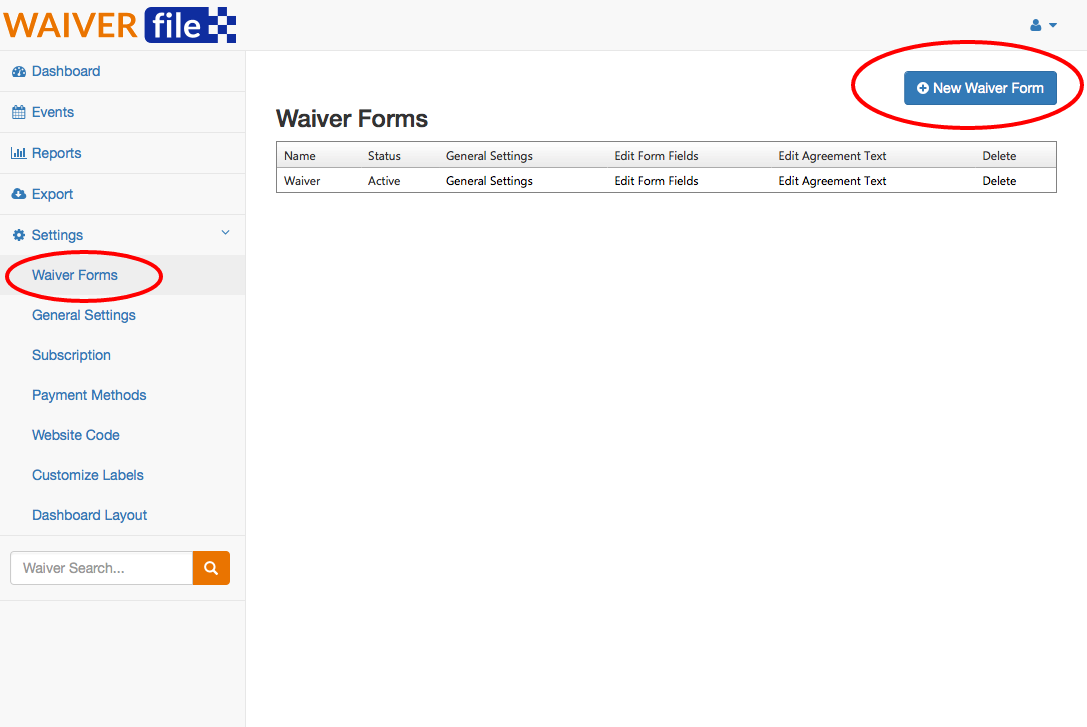
Once logged in, go to Settings >> Waiver Forms.
You should have at least one waiver form already. You can edit this one, or create another one by clicking on the New Waiver Form button on the top-right.
Complete the new form wizard to set up all the options for this Waiver Form. One of the options on the first screen is to “Include in General Admission”. When checked, this will offer the new Waiver Form to all general admission customers. If you have more than one Waiver Form with this option enabled, customers will be presented with a choice of forms after clicking on “General Admission”.
On the next screen, you can create custom questions. There is no limit to the number of questions you ask for, however for simplicity and ease of use, we recommend keeping the number of fields to a minimum. The more form fields you have, the longer it will take customers to complete the form. Of course, it is valuable to collect certain types of information, so the balance of easy to use vs data will be up to you!
On the third and final screen, you will enter the agreement text for your waiver form. This can be the same or different depending on your needs. If you wish to make it the same as an existing form, you can edit that form, copy and paste the text into the new one.
Once you have saved the form, you will see it appear in the list. There are links to edit each section of the form if you need to make changes. Additionally, you can disable forms and re-enable them by changing their status under the General Settings link for that form.
Different Waiver Forms for Events
The other way to leverage multiple waiver form support is with events. WaiverFile has an intelligently designed workflow for event management. When you create each event, you will have a selection of all your active waiver forms. You can enable or disable whichever forms are relevant for each particular event. As with general admission, if you have more than one waiver form selected for an event, customers will be asked which form they would like to fill out.