Subscriber Lists and Segments
Use subscriber lists and segments to organize the contacts that you collect so you can send out targeted messages.
Subscriber Lists
To create a subscriber list, start by going to the dashboard and then to Text Messaging >> Subscribers. You will begin on the Lists tab where you will see one option for All Subscribers. It will show you how many are there and a link to view them. Click New List on the top-right and give your new list a name, then click Save. When you import new contacts or enter them manually, you can import them into separate lists to keep track of them.
Coming soon: In a future release, you will be able to choose which lists new subscribers are placed into when signing forms, as well as offer the choice for different lists when signing a waiver.
Segments
Segments are automatically-updated lists that you can create and use to send targeted sms text message campaigns. They consist of one or more filters that pull from your waiver data and stay updated with matching contacts.
To create a segment, log into the dashboard and go to Text Messaging >> Subscribers, then click the Segments tab. Then click on New Segment. Give your segment a name, and then choose its options:
- Date and Date Filter Mode - this will filter out results based on either the date signed, event date, or check-in date.
- Filters - here you can add any additional filters that you like. Consider adding filters for things like age range or location (zip code, state).
Once done, click Save at the bottom.
Your new segment will initially say “Calculating…” under the subscriber count column. It can take a few minutes for this to calculate. You can refresh this page and the actual total will appear once it has been calculated.
Once you have created a segment, you can use it in sms text messaging campaigns.
Campaigns
You can use WaiverFile’s SMS text messaging campaigns to schedule messages to be sent to targeted groups of subscribers with promotions, event information, or anything else you need.
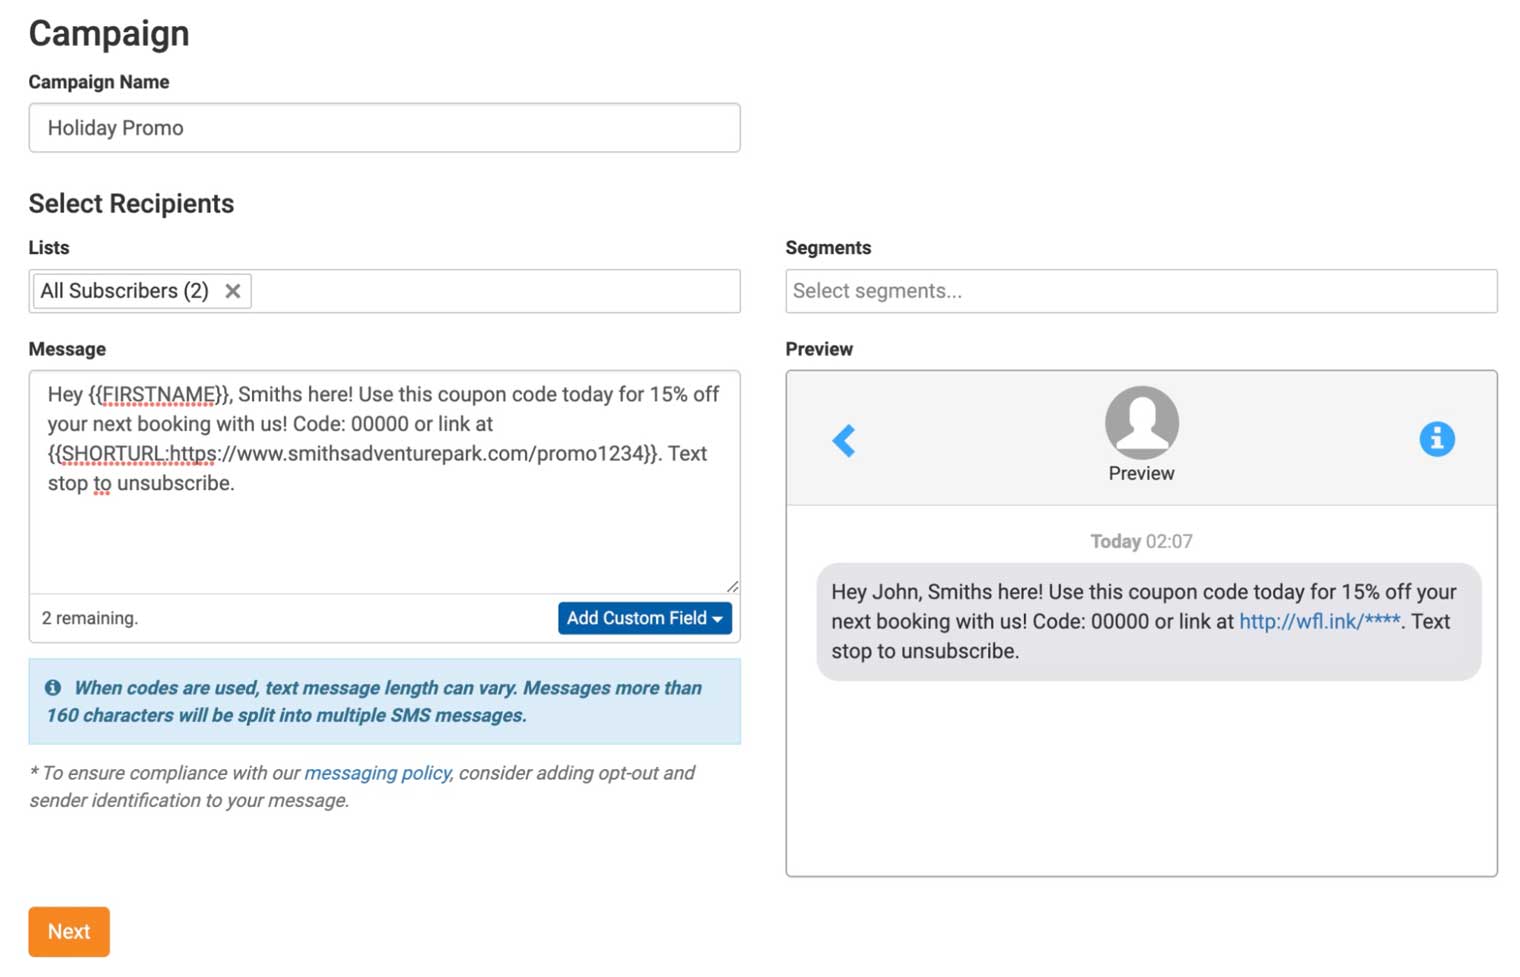
To create your first campaign, log into the dashboard and go to Text Messaging >> Campaigns. On the top right, click on New Campaign. Give your campaign a name.
Choose the recipients for your new campaign. Click on the Lists and Segments boxes and select the groups that you want to target. The number of recipients found in each will be listed along with the name.
Enter your message in the message box. A preview window will appear to give you an idea of what the message will look like. Use the Add Custom Field button to enter codes such as first and last name that will fill-in for each person to customize their message.
Below the editor you will see a character-remaining count. Each SMS message can be only 160 characters. If your message is longer than that, the system will break it up into multiple messages. Note that the extra messages will count towards the quota of your messaging plan.
If you are using codes to make for dynamic messages, be aware that the length of these can vary. For example, if your message is just short enough for someone with a short name, it may wind up longer for those customers with a longer name.
You can add links to your message as well. Just add the link text such as https://www.waiverfile.com. When you do, an orange button will appear, Shorten Links. Click on it and it will convert your links to use WaiverFile’s Short URL Service. The link will appear as https://wfl.ink/**** (the stars at the end will be your code). By using a short URL it will let you put longer links in your text messages without being so long that it pushes to additional messages.
When drafting your message, be sure to follow the guidelines in our messaging policy. It’s important to identify yourself as the sender if you have not contacted this group recently, and adding the note that customers can text stop to unsubscribe is also a good idea.
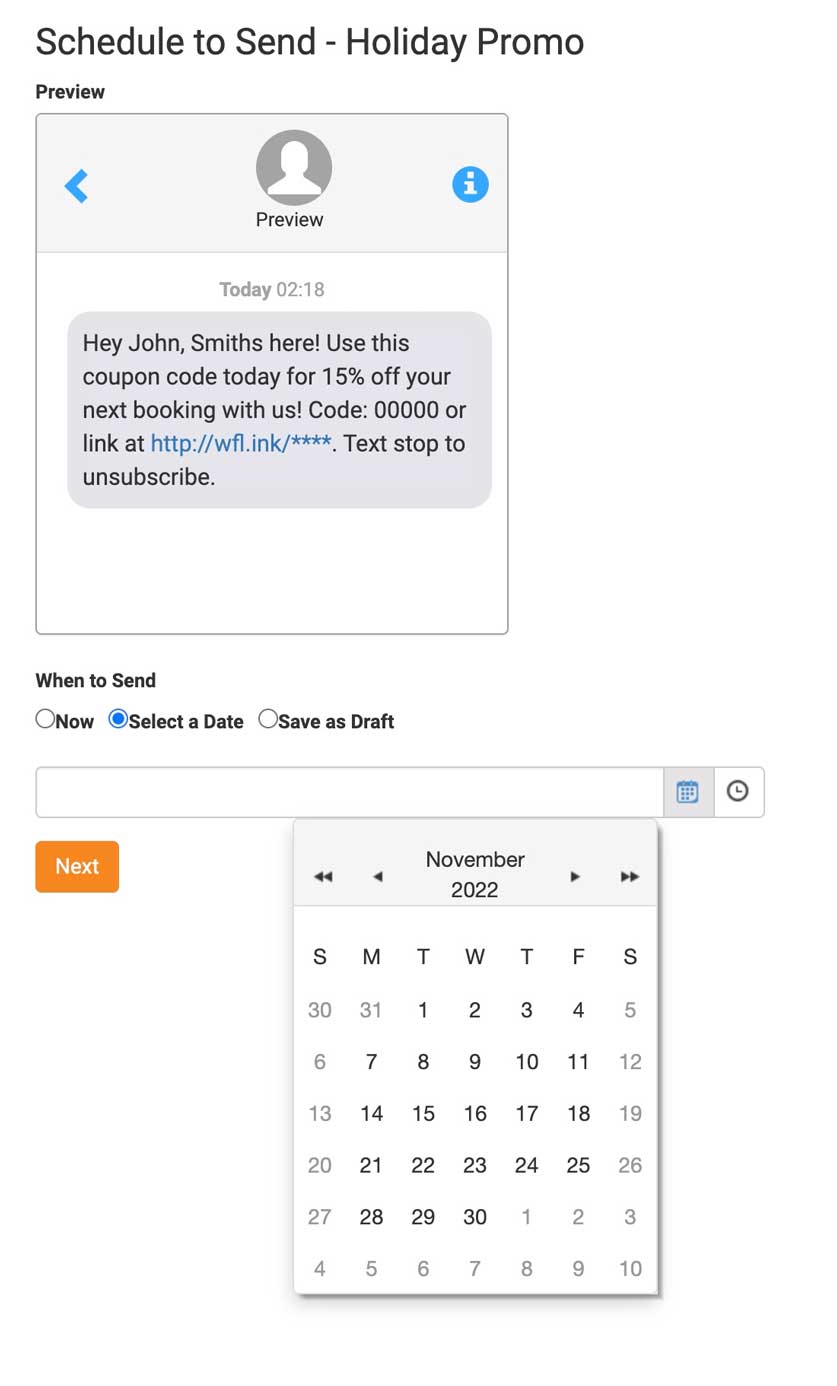
After you’ve prepared your message, click on Next. On the next page you will select when to send the campaign. Choose “now” and it will send within a few minutes (note that large campaigns to many subscribers can take some time to process). Or you can select a date and time in the future to send. If you aren’t ready yet, choose Save as Draft and you can come back to it later.