WaiverFile Events Tutorial
Creating Events in WaiverFile
The Events feature in WaiverFile makes it easy to manage parties and groups and ensure that all attendees have completed their waivers. You can even leverage the check-in features to make managing your entire event a smooth, easy process.
Create an Event
Creating an Event in WaiverFile is easy. From the admin, select Events, and then on the top-right, select New Event. Complete the form with your event details:

The event name and date options are straightforward. If you have more than one waiver form, you can choose which forms are available for this event.
Event Managers
You can invite event managers to an event. Add one or more email addresses to the box and an email will be sent out to each person. The email will include a link to access a list of names for that event. This is different from the admin access that you can use for your employees to access the dashboard. As an event manager, the recipient will be able to see a list of names of signees and participants for the event, but not the entire waiver forms or other customer information. This can be useful if you want to send an event coordinator access so they can help ensure all their guests have completed a waiver.
Event managers will receive an automated email when you save the form. If they don't already have an account, a randomly generated password will be included. You can also include an optional message that will be included in the email that is sent.
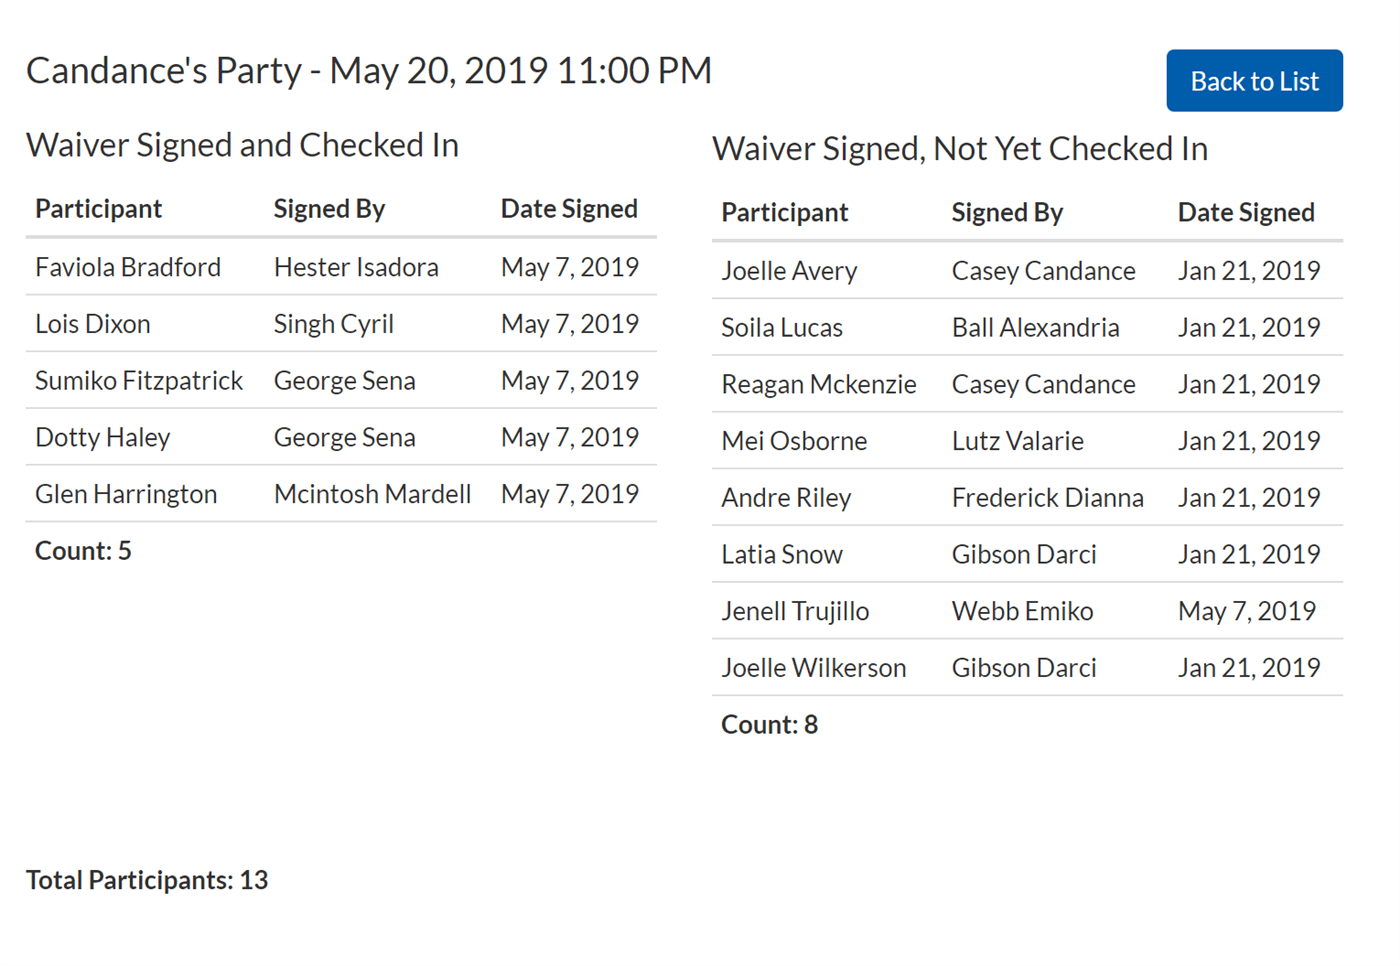
The link sent to event managers will take them to a view like the following:

Manage your Events
After you've created an event, you can view it in the list of events anytime. Use the dropdown on top to view upcoming events, past events, or deleted events.
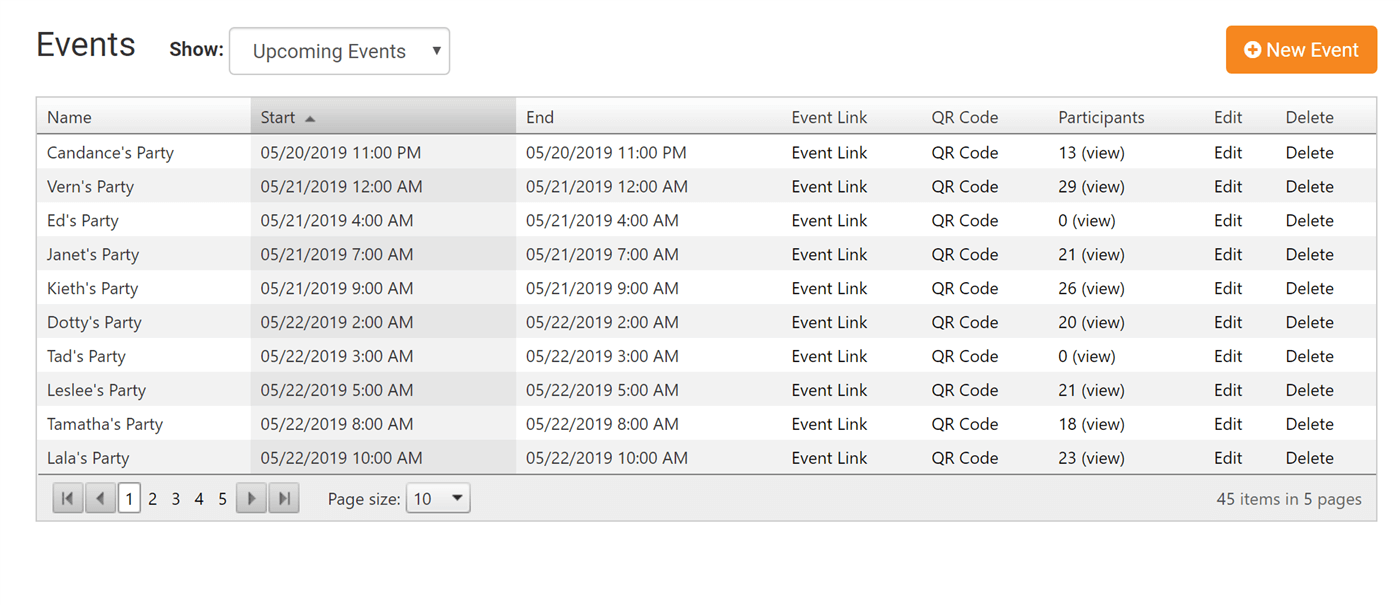
Link to the Event
Next to each event are a few links. First is the Event Link. This is a direct link to the signing page for that event. If you have selected more than one waiver form, the visitor will be given a choice of waivers to select from first.
Get a QR Code for the Event Signing Page
The next is the QR code option. This is a tool that will give you a QR code that you can download, print, email or share. The code, when scanned, will direct you to the signing page for the event. This can be very useful for helping customers sign faster. If you print out and post the QR code for an event, customers can scan the code with their phone and complete their waiver right there. Since iOS devices natively scan QR codes with the Camera app, it's easy and intuitive for customers to scan the code without any special software.
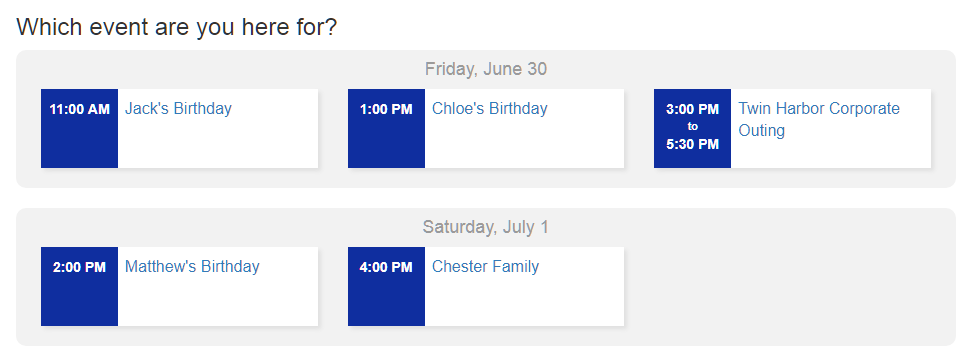
Easy Event Selection
If you don't wind up directing customers to the exact link for their event, it's still very easy to just direct them to your main signing page (e.g. waiverfile.com/b/MyBusiness). Visitors will be directed to the event selection screen which makes it easy to find the upcoming event they are looking for.