
WaiverFile makes managing waivers for sports tournaments easy using the Workflows feature. In this article, we’ll walk you through the steps required to get a workflow setup to manage your tournament, invite coaches, and more. Be sure to check out the video below that follows along with these same steps.
To begin, we'll start with an Excel file that contains the necessary data. Many sports tournament software platforms provide data in Excel files. The sample data we'll use includes team names, age groups, coaches' names and emails, and managers' emails. In our example, we want coaches and managers to have access to see who signed the waivers for their team. So, the first step is to have a unique team name that we can map into WaiverFile. Your tournament may have multiple teams with the same name for different age groups. If your spreadsheet has this broken out into columns, we just want to combine them into a single column so each team name is unique.
To do this, you can use either the CONCAT() function in excel, or you can use notation with the & symbol to combine them. Creating a new column in Excel called "WaiverFile Name", or similar. To do this, right-click on the column header, click "Insert", and type "WaiverFile Name". Next, we'll join the columns together by clicking the equal sign, selecting the first column, clicking on the "&" symbol, and adding a space in quotation marks. Repeat this process for any additional columns you want to include.
Formula sample:
=A2&” “&A3
Then click the small square dot on the bottom right corner of the selected cell with the formula, and drag it all the way down to replicate the formula for all teams. Finally, save the file.
Next, we'll jump over to WaiverFile and work on the import process. Once you're on the dashboard, click on "Workflows" and then select "New Workflow". Give the workflow a namethat matches your tournament name, and set the status to "Active" (If you have other tournaments going on and want to hide this one for now, you can select Disabled). For the mode, select "Events".
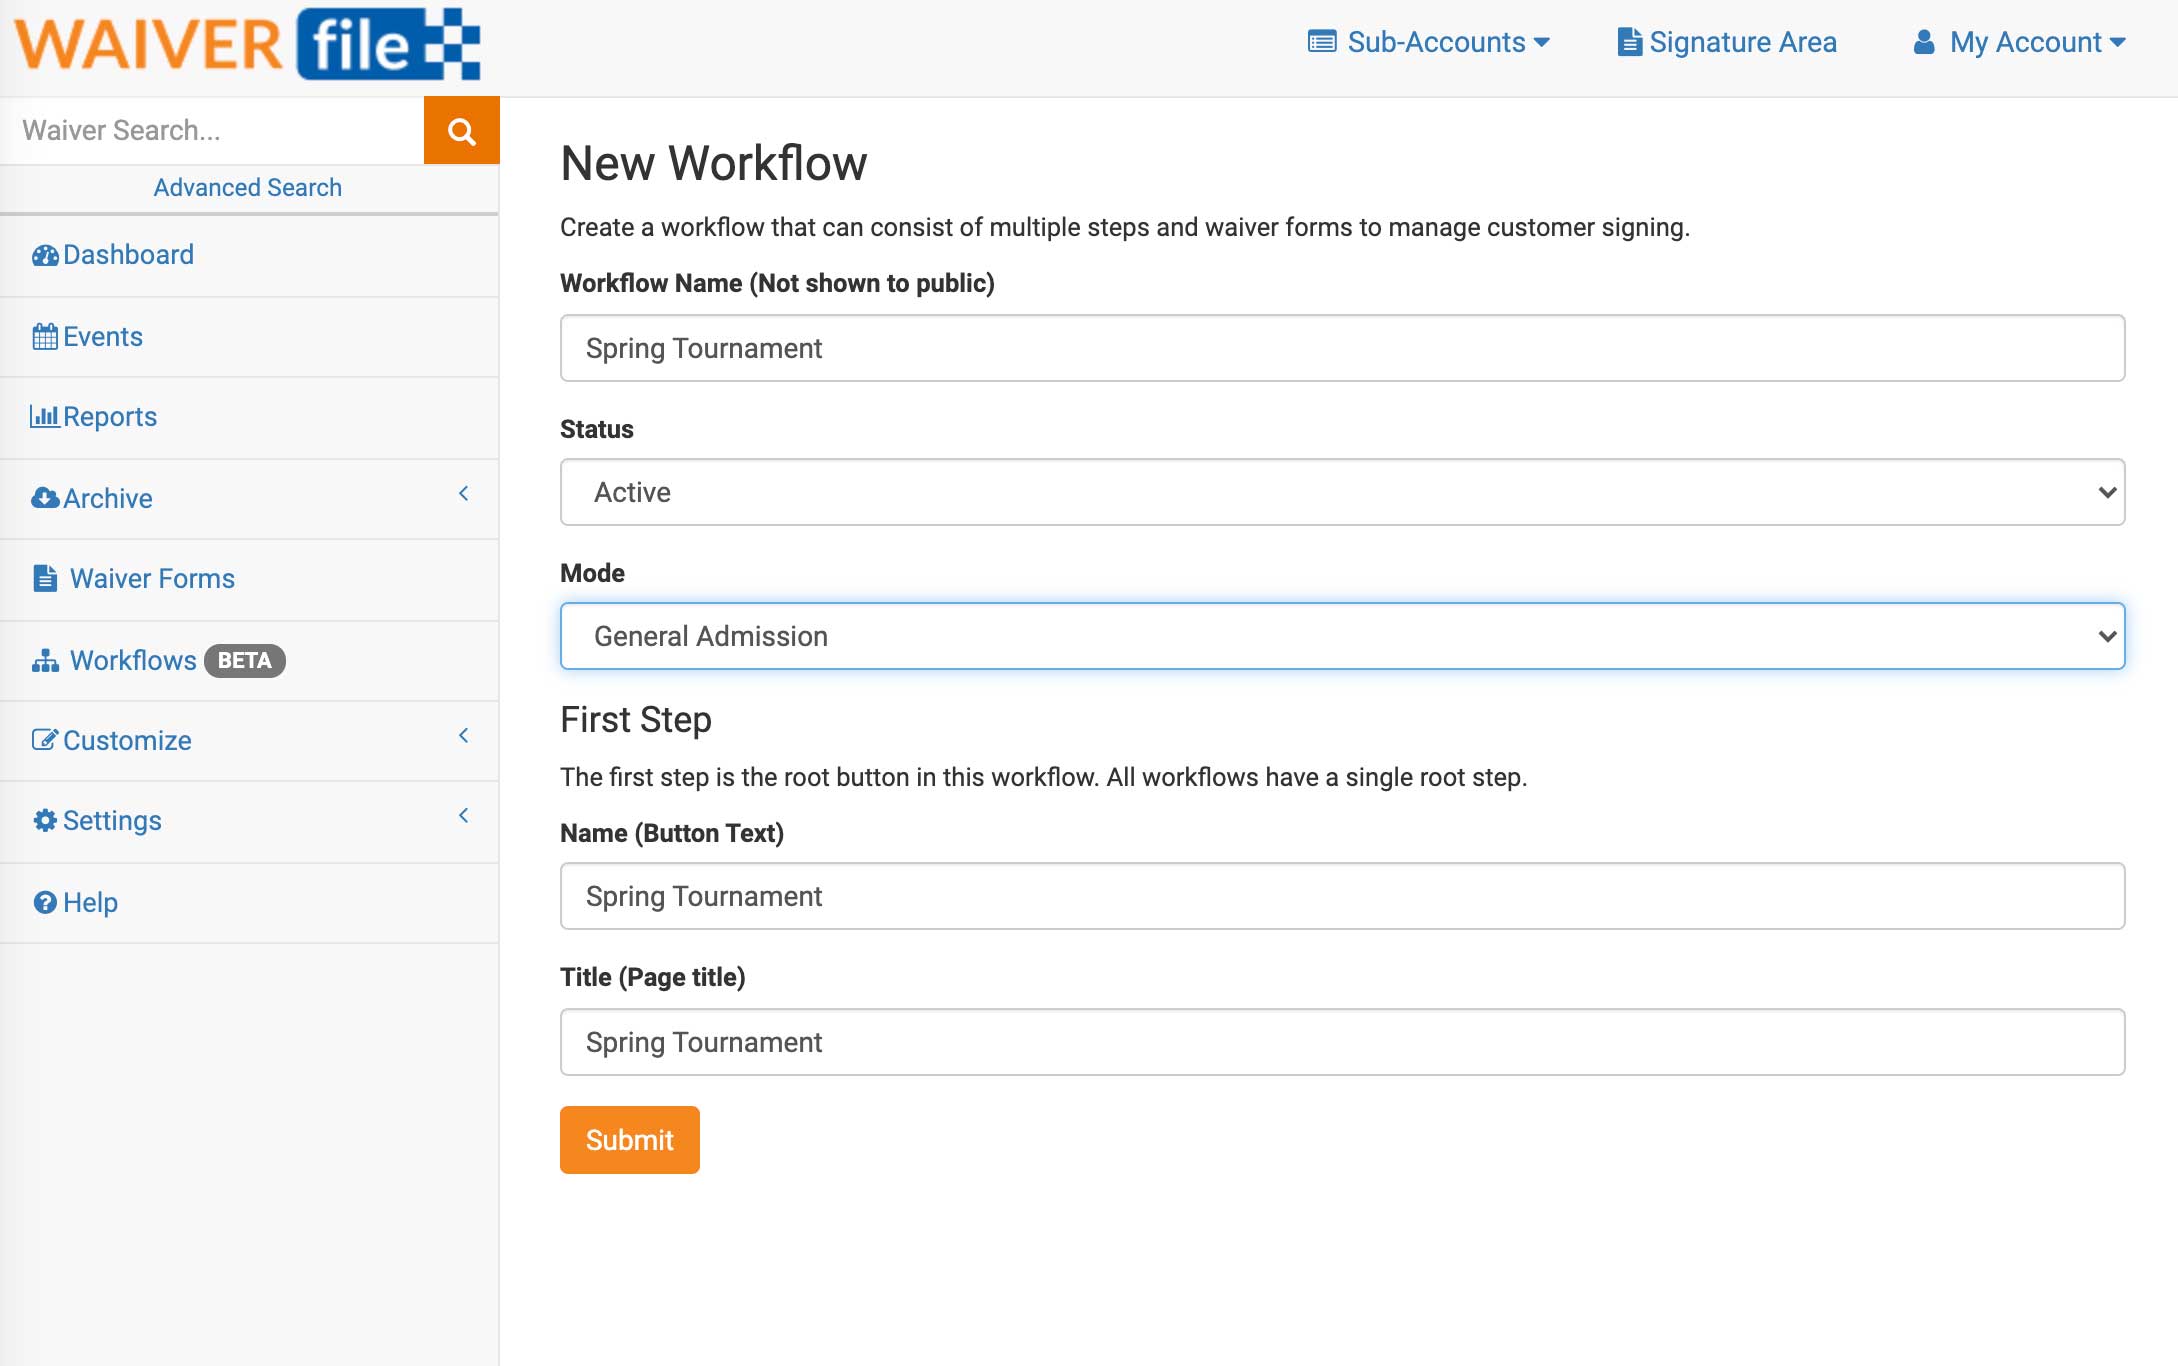
If you select "General Admission" or "Both", you'll get a button for your tournament on your main page. By tying the workflow to an event, you'll get more reporting options and better group the data together.
Once you've entered this information, click "Submit" to save.
Creating Steps
You can create the steps within the workflow in a variety of ways, but a common way is to group players, coaches, referees, and staff separately. If you have players and coaches tied to a team but also want to collect a waiver for referees or staff who don't have a team, create a choice first. To do this, click "Add a Step" and name it "Players and Coaches". Next, add another step and name it "Referees and Staff".
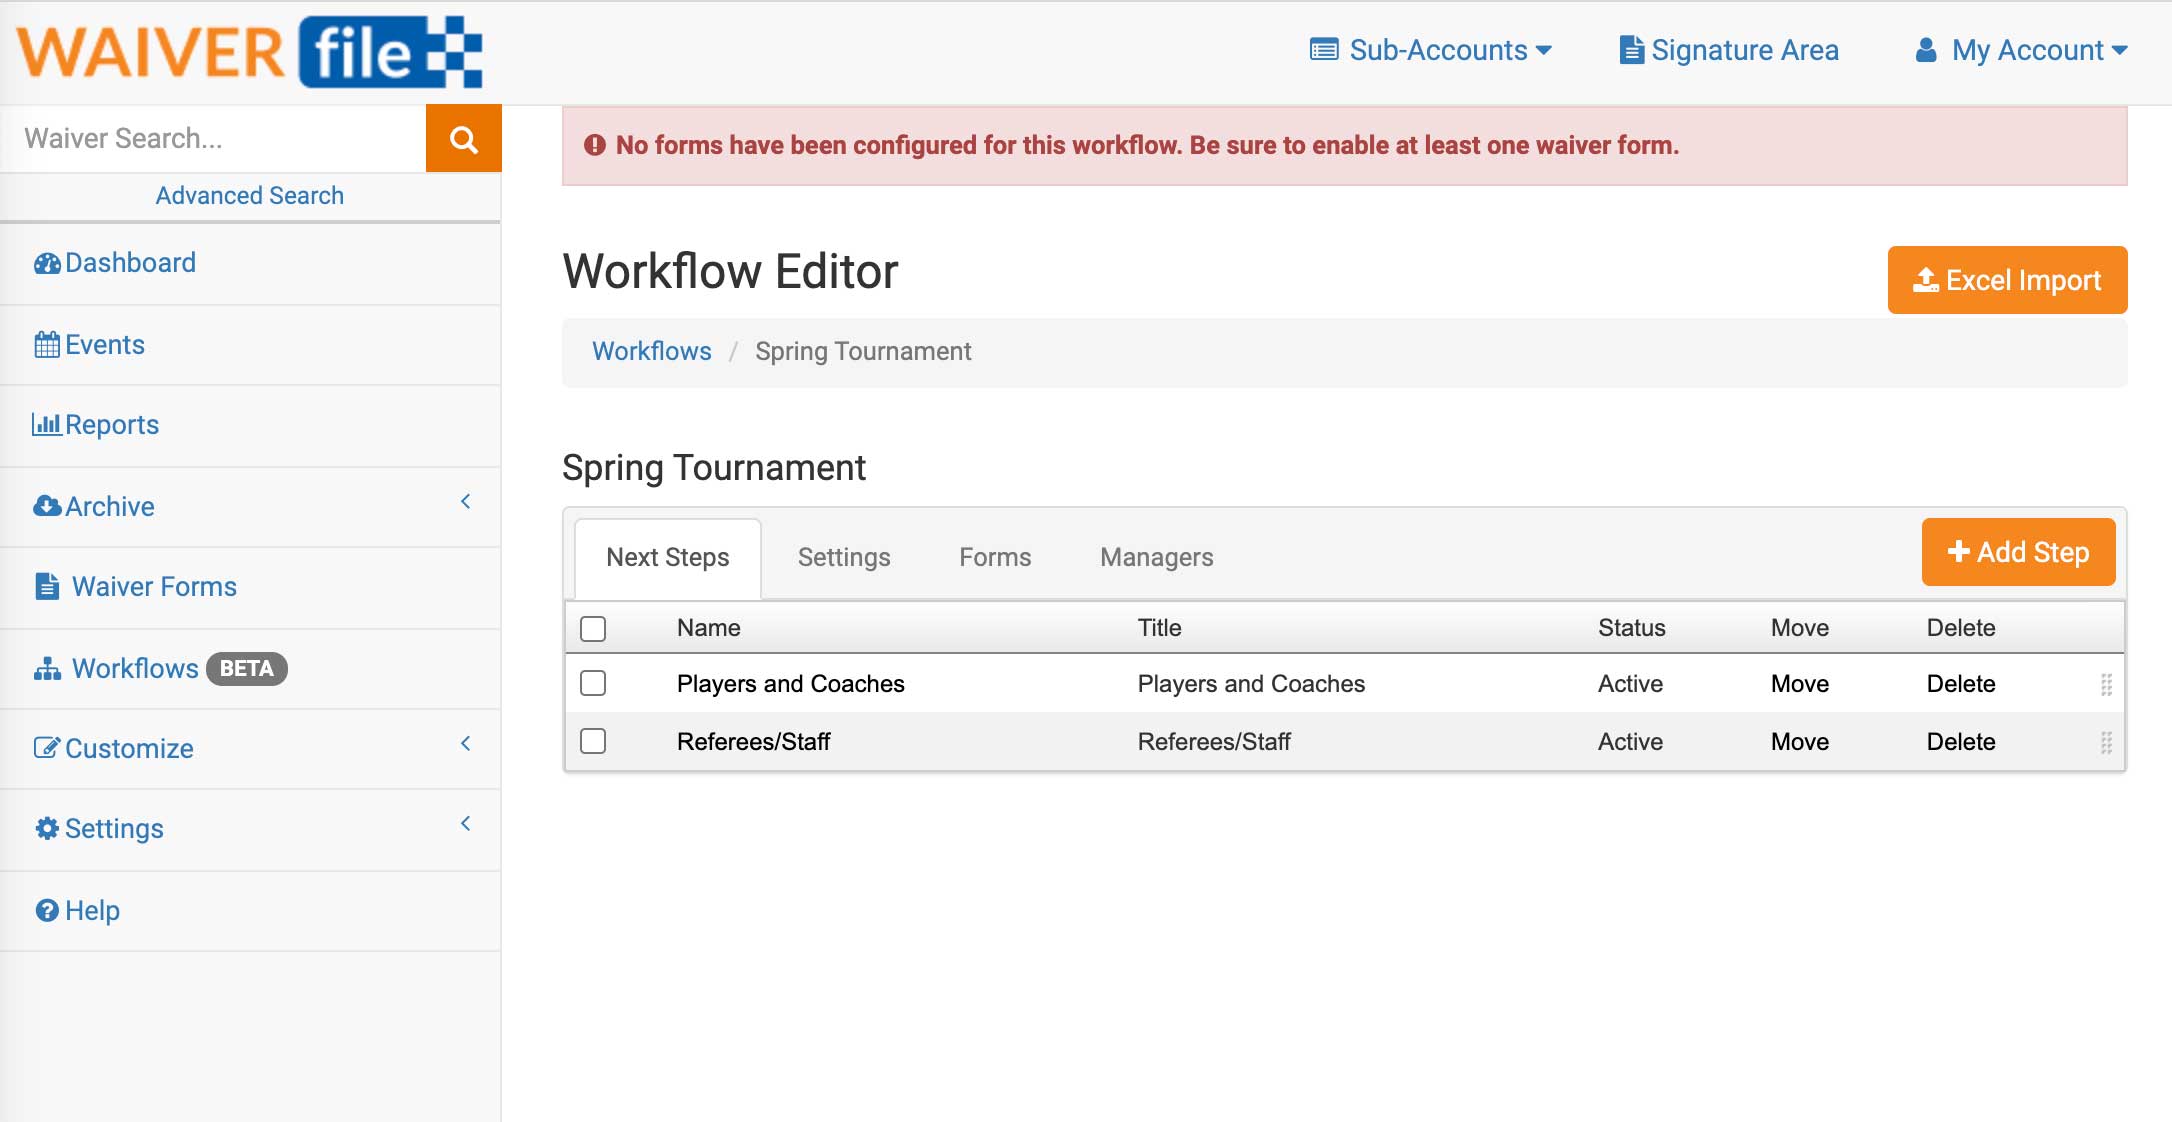
Next, attach the form you’ll be using by clicking on "Forms" and then "Add Forms". If you don't have a waiver already set up, you can refer to other videos or reach out to the WaiverFile support team.
Create the Corresponding Event
The next step is to create the event that this event will map to. Go to Events on the left, then choose New Event. Enter the name and date of your tournament.
Uncheck any waiver forms that may have been attached by unchecking their boxes. Then check the box for your workflow. Save your event.
Now to back to Workflows so we can complete the import of the teams. Next to your workflow, click Edit.
Click on the Players/Coaches step to navigate into it. Click the Excel Import button on the top right.
-
Under Select File, click to find your Excel file.
-
Check the box if your data has a header row (the first row has column names)
-
Ensure that players/coaches is set as target step in the dropdown list - this is where we are going to import the teams
-
Ensure that the event has been selected below. It should load automatically if you setup the event and selected this workflow.
-
Click Next Step.
-
Configure each of the columns and where they should go. Each one can be:
-
Step Name (this will be the button shown)
-
Step Title (the page title when viewing this step)
-
Step Manager Emails
-
You can have multiple columns for email invites if desired. Just map each one to the Manager Email field.
-
For the Manager Invites option, choose Add or Replace. Add will append new manager invites to each step. Replace will remove any managers that may already be part of that step (it matches it based on the step name) and then adds the new ones.
-
* If you don’t want to send invites right away, you can import the teams without mapping the email address fields. When you are ready to send them, run this import process again, this time selecting the email fields. The team names will match up (no duplicates) and the invites will be sent this time.
-
Review the import preview to make sure it looks correct.
-
Click Complete Import
Coach/Manager Invitations
If you have imported coaches or managers while setting up your workflow, each will receive an email message containing details of the event. The email includes two links:
-
A link to the waiver for their team. The coach/manager can copy this link and send it out to all the players or parents on their team. This helps your workload greatly since coaches can easily pass this out and get their team signed up.
-
A link to the manager’s area. A password will be generated for new accounts automatically and coaches will receive their login information. When they go to the manager area, they will log in and here they can view a list of names of everyone who has signed for their team. They don’t get a fully copy of the waiver, just a list of names. If you wish to customize the fields that are shown here, you can do so under Settings >> Event Settings >> Event Manager View Fields.
Handling Multiple Children on Different Teams
You may want to allow parents to sign for multiple children for the same tournament when they might be on different teams.
To enable this:
-
Go to Workflows
-
Next to your tournament workflow, select Edit
-
Go to the Settings tab
-
Scroll down and set the Alternate Step Selection Mode to Include.
-
Uncheck the Inherit box for the Alternate Step Label and edit the field to say “Team”.
Once enabled, when adding additional children to a single waiver, it will ask for the team and others can be selected using the same searchable drop-down menu as before.
Signing Process
The process of signing a waiver within a workflow is designed to be as straight-forward and easy to follow as possible. Users will be shown clean, easy to read buttons for each step. If there are more than 10 steps to choose from within a workflow, a searchable dropdown list will be used instead of separate buttons.
Reviewing Signed Waivers
Once waivers are collected, you can view waivers in several ways. Coaches and managers who were invited will use their Manager link and see a limited view. As an account administrator, you have additional views that you can use. First, in the dashboard, you will see the event appear. (If you have lots of events, it may not appear until it gets closer to the date of the event itself). In this section, all players will appear regardless of team.
The next place you can go to is Events on the left, then click on the View Participants column for your event. Again, in this area all players are shown together.
To view waivers by team (or step within the workflow), go to Workflows on the left. Click view waivers next to your workflow. Click through the steps to navigate through the workflow and you can find who has signed within each section/team.
Learn More:
Workflow Documentation